Miss us? So, after several reminders from several people - and one person in particular, *coughcough* - I've decided to make time to get this blog up-to-date. It's no coincidence that the last post was right before I stopped working from home. What? I'm busy! I have a job and a life!
So, no, our bathroom is not still stripped to the drywall and subfloor. Being our only bathroom, we were forced to put it back together, pretty much immediately.
So, while Evan and his dad were ripping the bathroom apart, I sat outside on a beautiful July day, and figured out our new flooring.
We didn't really require much discussion when picking out a new floor for the bathroom. We were both like, "yep, hex tiles," and I suggested maybe a cool pattern. We decided that white tiles, with black tiles placed seemingly randomly (but not really!), would look really nice.
One drawback - hex tile sheets don't really come pre-made with cool patterns, such as ours. Instead, you get to carefully cut out individual tiles from one sheet, and replace them with tiles cut from other sheets!
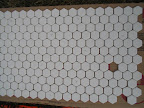
A white sheet of hex tiles in the process of being altered to our pattern. You can see all the penciled-in x's on tiles that are to be removed. Note my attention to detail! Never does the pattern get screwed up!

Pile o' misfit hex tiles.
HOURS later, after destroying the bathroom, carefully measuring the room, x'ing and cutting tiles, and laying the sheets out
just so, the floor begins to take shape:
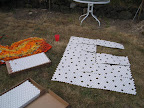
Not tiling the backyard, though that grass is awfully ugly...
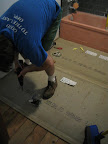
In the bathroom, Evan lays down the cement board to which the tiles will be cemented.
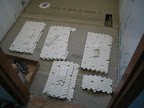
Sheets of tile stacked in the order they need to be installed. Points to me for not screwing up the pattern here either! Note, no black tiles - they are in a bucket, waiting to be carefully placed in their holes, once the larger sheets are cemented down.
And then a bunch of stuff happens. I don't have pictures, because tiling a floor requires two people to move very quickly. No time to whip out the camera!
To recap:
We mixed tiling cement in a bucket. Using a cement trowel, we glooped the cement on the floor (technical term, there), spread it out, and then dragged the jagged edge of the trowel through the cement to create ridges. These ridges grip the tiles better (don't ask me why). Then, we'd take a sheet of tiles from the correct pile, carefully lay it on the cement so as to avoid cement squishing up and over the tile, and then pop the black tiles in place. And repeat.
Once everything was down, and dried, we mixed the grout up, and using a different, rubber, trowel, spread the grout over the tiles, pushing it into the spaces between the tiles.
Then, we deviated from procedure -- you're supposed to wait, like, 3 days before doing anything to the floor, such as sealing the grout or putting heavy things on the floor. But, by this time, it's Monday morning and we haven't had a toilet since early Saturday morning. Thankfully, we have really generous neighbors who let us use theirs all weekend, but we really needed our own at this point.
So, we jump out of bed early Monday and install a toilet! Toilet installation goes a lot faster than you'd think. Maybe half an hour?
So, you install the bracket, and the wax ring and screws, and carefully seat the bottom of the toilet on top of all of that.
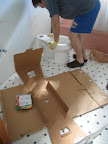
Evan, seating the toilet. Look at the floor!
Then, you screw the bottom of the toilet to the bracket (NOT to the floor), and screw on the tank. After that, you hook up the water valves, turn on the water, and voila! Tank fills with water, and you can pee again.
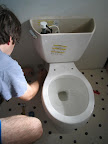
Evan, hooking up the water to the toilet.
Other things I don't have pictures of: finished floor, fully installed toilet, the toilet seat (which you have to buy separately), the grout on the floor getting all dirty because we put things in and used the bathroom PRIOR to sealing the grout...
Yeah... white grout? Not a good call. We did seal the floor when it was time, but by then, the grout had already slightly discolored. Something to take care of in the future.